
Installing IBM Lotus Quickr Domino with LDAP access
As every other organization we are looking for ways to organize us internally in a professional way. With the usage of IBM Lotus Notes combined with IBM Lotus Sametime and BlackBerry Enterprise we are very well equipped with a lot of collaboration stuff. When I see our daily business with those technologies I can say: we are productive!
The next “evolution” step should be the adoption of a “file management system”. So I’m looking deeper into the possibilities of IBM Lotus Quickr (yep - another great IBM Lotus product).
In this SnTT I’ll show you the way how to install a Domino based Quickr with Domino LDAP access on top of Windows Server.
Step 1 - Download the files from IBM Passport Advantage At first you’ve got to download the appropriate files from IBM Passport Advantage. As I hope you are a regular user of this website, so I don’t need to tell you how to use it. The actual version of IBM Lotus Quickr is 8.2.
Step 2 - Download the current hotfixes I recommend to download the current hotfixes before installing the server. That’s a lot more smoother than applying them afterwards. You can download them from Fix Central. As the same as with Passport Advantage you should know how to use this website.
Step 3 - Create an user entry for LDAP access For accessing the LDAP on your Domino server you need an enabled user (if you don’t already have one). As the access uses the interet password of the user you don’t need to register a new user. Just create a new person doc in your Domino Directory, assign a hierarchical name and an internet password to it - finished.
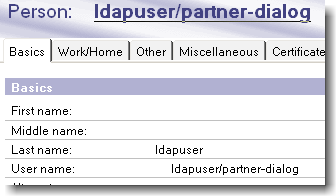
This user should be granted access to read the Domino Directory. For your convenience you can put him in an existing group - or whatever you’d like regarding your administration policies.
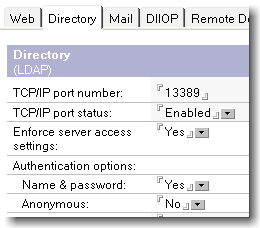
Step 4 - Activate LDAP in your Domino Directory Using LDAP authentication with Domino requires the enablement in the Domino Directory. For this you’ve got to change the following settings: Enable the LDAP port settings in the server document (Ports => Internet Ports => Directory). For security reasons you should disable the Anonymous access.
Step 5 - Configure your Directory assistance (optional) If you are using a Directory assistance you need to allow LDAP access in the appropriate config docs (even for your names.nsf).

Step 6 - Test LDAP After all this configuration stuff you should test it. Just open a console and enter “load ldap”. You should see something like this.

Step 7 - Configure LDAP to start at server startup There are several ways to start LDAP at server startup (as you now how to administer a Domino server). I. e. you can do it with a program document or via a notes.ini setting.

Step 8 - Installing Quickr After a lot of preparation you can now start with the Quickr installation. At first you need to shut down the Domino server (and the jconsole if in usage). After that you start the installation with a double click of the setup.exe. The first steps are quite easy so I just show you the screenshots.
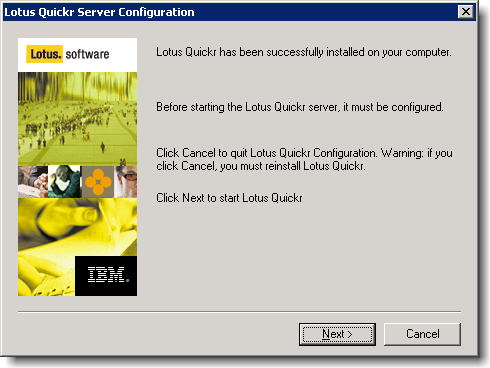
After the first steps you need to setup the first local user of the Quickr places. !! Beware !! Don’t click cancel - or you have to re-install Quickr! And don’t enter the name of an existing user! Finished - you installed Quickr.
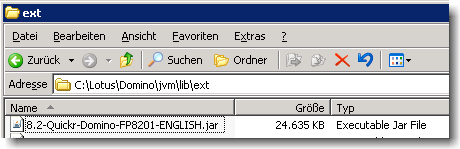
Step 9 - Apply the current hotfixes To apply the current hotfixes you need to place the downloaded JAR-filen into your jvm/lib/ext-directory beneath your Domino program directory.
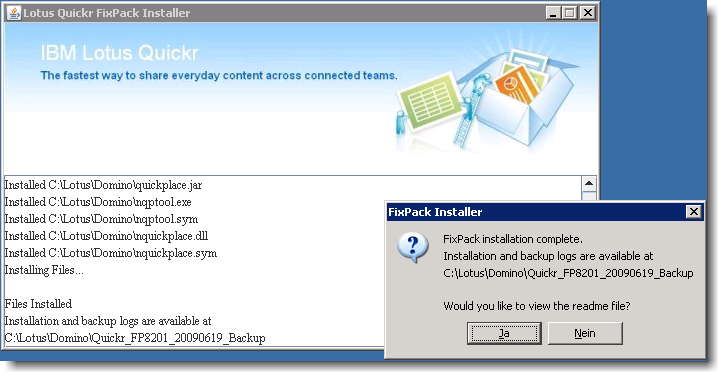
Just start it with a double click and walk through the dialog boxes. The hotfix installation is really simple and after a few seconds you should see the following screen.
Step 10 - Check notes.ini Some 3rd party products - like BES - set the notes.ini parameter “HTTPDisableJVM=1”. This one needs to be disabled when you want to use Quickr (you although have to disable it for Xpages or Sametime).
Step 11 - Start the Domino server After all the installation stuff you can now start your Domino server… On the console you should see this message 16.07.2009 20:40:07 HTTP Server: Lotus Quickr Services loaded successfully. Release: 8.2.0.1 Build: QRD8.2.0.1-004b On Domino: Build V85_12052008.
Step 12 - Configure Quickr for LDAP access Now you need to configure Quickr to use LDAP as directory service. For that you need to open the main place with your favourite browser.

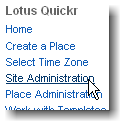
After you’ve opened that site you need to log in (upper right corner) with the local user you’ve setup in the Quickr installation process. After you’ve logged in successfully you’ll see the new menu items in the bottom left corner of the places view. Click on the link for the Site Administration. Then you’ll be led to the Administration database (known as admin.nsf).
On the left side you need to choose the entry “User Directory” and then the button “Change Directory”. Then you’ve got to fill out the shown fields. As you can see in the screenshot you need to use LDAP syntax.

I recommend to set the “New Users” value to “Disallow new users” if you want to avoid the usage of local, non-domino users!
That’s all folks…
